Condiments

Easy AIP Pesto

My dad first started experimenting with Pesto back in the late 70s.  I remember loving basil pesto (on pasta!) so much that I would beg to have the leftovers for breakfast.  Not bad for a picky eater!!

Over the years I have consistently made pesto with the basil harvest from my garden or what I get at the farmer’s market.  When I found out I was allergic to dairy, I started using walnuts in place of the Parmesan and pine nuts.  I think I liked this even better, especially with a little squeeze of lemon.

But now on AIP, no nuts.  I wasn’t sure what to do about pesto with no nuts at all.  Turns out, I didn’t need to worry at all … it’s just fine without any nuts!

Ingredients:

1 large bunch of basil
3 cloves of garlic
1/4 cup of olive oil

Put all ingredients into a food processor, blender, or cool processor attachment to your stick blender.  Process until the consistency you want it.

20130223-203405.jpg

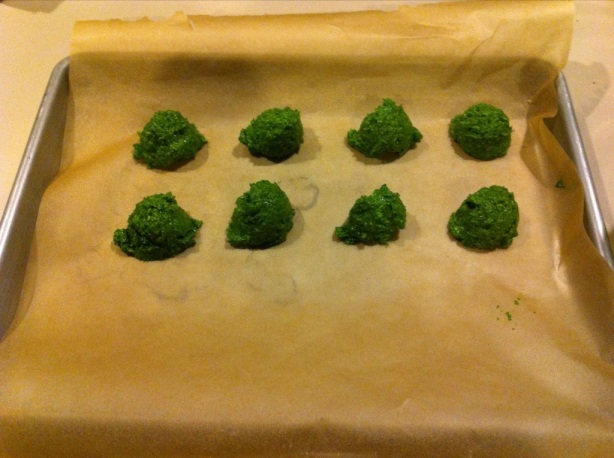
Now, I’ll share a little secret with you.  I have a large herb garden in my back yard.  In the fall, I harvest lots and lots of herbs to store for the winter.  Some I freeze whole in zip-lock bags.  Some I strip the leaves off and freeze the leaves in zip-lock bags.  And some I puree and freeze in tablespoon-sized chunks.  This is what I do with basil and/or pesto.  I use my handy Pampered Chef 1 Tbs scoop, and scoop onto a parchment paper lined cookie sheet.  Then I freeze and store in a zip-lock bag.  When I want pesto on my spaghetti squash I pop a couple out and defrost to mix into my cooked squash.  Yum.  I do this with other things like chipotle peppers and tomato paste too.  That way none of it goes to waste and you have the small sizes most recipes call for.  Some people use ice-cube trays and that works too, I just think they’re a pain to clean (and I don’t want my basil tasting like chipotle) so this works better for me.

20130223-203415.jpg

20130223-203426.jpg

Categories: AIP, Condiments, Recipes | Tags: , , , | 1 Comment

Paleo Mayonnaise

20130215-143607.jpg

I love mayonnaise.  In fact, I may have a mayo problem.  But I’m okay with that now that I am not eating industrial-seed oil mayo filled with preservatives and other icky things.  I make my own mayo at least weekly.  AND I ferment it to give it a longer shelf life and a bit of tang (and to make it even better for me!).  So I don’t feel guilty about eating it.

No idea what Lacto-Fermentation is all about?  Well, that fancy jar you see my mayo in  is called a Pickl-It.  It is a special vessel that doesn’t allow any air in, so that as the item inside ferments, the air is pushed out through the airlock at the top and leaves only good stuff behind.  To get the most LABs, you need an anaerobic environment (anaerobic means without oxygen).  I’m fairly new to this method of fermentation, but with the Pickl-It, no more failed vegetable ferments.  Kerry-Ann Foster over at Cooking Traditional Foods has a whole video class on Lacto-Fermentation you should check out if you are interested.  She is an amazing source of information.  I also highly recommend Lisa Herndon’s book Lisa’s Counter Culture.

There are many “paleo mayo” recipes out there in web-land, and I’m not sure you need another one from me.  I use the recipe in Lisa’s book.  I’ve also used the one in Make it Paleo.  Since I seem to tolerate egg yolks, and in order to ferment the mayo, it needs salt, I use Lisa’s recipe, minus the mustard (not allowed on AIP).  But my point is, there are probably thousands of recipes on the internet for mayo.

I have a few suggestions to improve your outcome, as I’ve had many friends struggle with getting mayo right.  My method is fool-proof!

1.  Everything must be ROOM TEMPERATURE.  Eggs, oil, lemon, water, everything.  When I know I am going to make mayo, I take everything out of the ‘fridge in the morning and then make the mayo just after lunch.  (That gives it time to ferment on my counter for at least 4 hours before dinner.)

2.  Use ONLY light-tasting olive oil.  Don’t bother with avocado oil or any of the other oils you hear about.  Just “light tasting” olive oil.  Readily available in all grocery stores.

3.  Give up on the blender or food processor.  Yes, I have successfully made mayo in both.  But it takes  f  o  r  e  v  e  r  because you literally have to drip the oil in one drop at a time.  Instead get yourself a tall plastic cup and an immersion blender.  I have a Breville that has a speed adjustment.  This is my second “stick blender” and I just love them.  Useful for all sorts of things.  But makes making mayo a snap as you’ll see in a second.

4.  Seriously consider getting a Pickl-It and Lisa’s book.  Seriously.  I think my healing started accelerating when I started incorporating truly anaerobically lacto-fermented vegetables and condiments into my diet.

Anyway, enough lecturing … here’s the best way to make mayo.  Dump all your ingredients into a tall plastic cup.  Stick the blender in and blend.  You might need to slowly lift the blender to the top of the cup to incorporate all the oil.


The great thing about making your own mayo is that you can add whatever you want to it for flavor after … making all sorts of dips and dressings.  A favorite in our house is homemade ranch dressing with coconut milk and Penzey’s Buttermilk Ranch mix (contains no dairy, but is not AIP-friendly since it contains bell peppers).  What are your favorites?

Categories: Condiments, Tips & Tricks | Tags: , , | 2 Comments

Blog at WordPress.com.